
Printing to 10.3 With Windows XP
1st Mar 2004, 21:11:13
This page documents how I set up my Mac running Panther to share it's HP DeskJet 1220C with Windows hosts on the LAN. It is written with reference to this Apple Discussions FAQ and This page DEAD LINK. Revised (complete re-write) 6th of October 2004
These instructions are written with reference to OS X 10.3.5 (Panther). There is no reason why it shouldn't work on 10.2.x (Jaguar) as well, but it might require you to adapt these instructions a bit. Since I don't have access to a Mac with Jaguar any more, this is left as an exercise for the reader. These instructions most definitely will not work on versions before 10.2, because they used lpd not CUPS.
| This article is out of date. It will be helpful if you are still running Panther, but does not apply to Tiger. For Tiger, see This Apple KB doc. | ||
Before you start, run software update and make sure you are running the very latest version of 10.3 with all the security updates.
On your Mac
- Go to '/Applications/Utilities/Printer Setup Utility' and make sure that your printer is installed correctly. If it isn't, install it now. You will have to restart you Mac after you install your printer before moving to the next step.
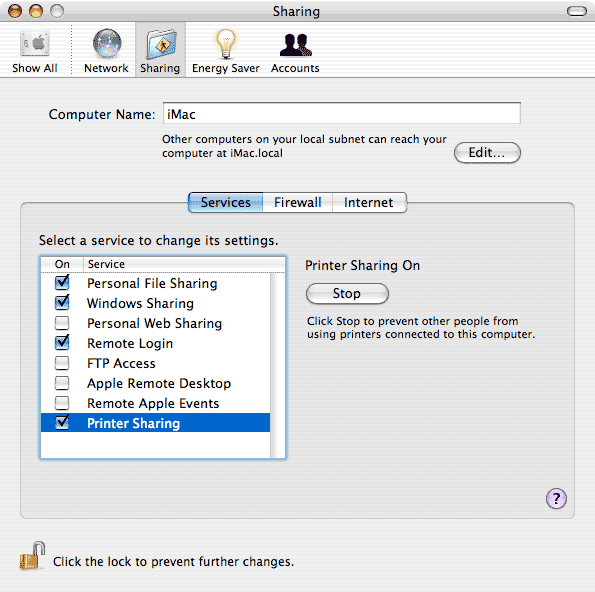
- Now go to 'System Preferences --> Sharing' and turn on 'Windows Sharing' and 'Printer Sharing' by ticking the boxes next to them. Be sure to give your computer a suitable name. By default, it will have a name like 'So and So's Computer', this is not a good choice, since names with spaces or special characters can confuse Windows computers that connect to your Mac.
-
Next, open up your favourite web browser and point it to
http://localhost:631which is the web interface for CUPS (the service that controls printers on your Mac) - Click 'Manage Printers' on the front page of the CUPS interface. Now you'll see a list of the printer(s) you have installed. You are going to add a new 'virtual' printer for Windows hosts to use, do this by clicking 'Add Printer'
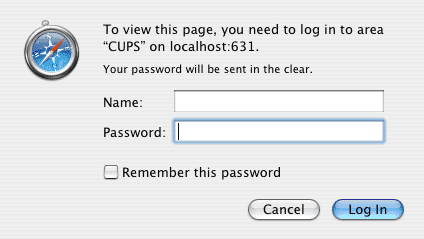
At this point you might be presented with a request for authentication. This is because Apple broke the web interface with one of their point updates, so lets fix it!
- Open /Applications/Utilities/Terminal
- Type
sudo pico /etc/cups/cupsd.confand press enter - Hold control-v until you reach the end of the document, which looks like this:
#Encryption Required

<Limit GET>

AuthType Basic

AuthClass System

</Limit>

</Location>
- Change it to this:
#Encryption Required

<Limit GET>

AuthType Digest

</Limit>

</Location>
- Press control+o, then enter, then control+x
- Once in the terminal again, type
sudo pico /etc/cups/mime.typesand press enter. - Press control+v until you reach the end of the file and look for this line:
#application/octet-stream
- Uncomment the line by removing the leading '#'.
- When you've uncommented the line, press control+o, then enter, then control+x
- Now you're back in the terminal, type
sudo killall -HUP cupsdand press enter to restart CUPS. - Next, type
sudo lppasswd -a userreplacing 'user' with the username you want to use for CUPS. This can be any name, it doesn't have to match the username you use on your Mac. Now press enter. - It will now ask you to provide a password for your CUPS account, do so and press enter. Do the same when it asks you to confirm.
- You should now be able to use the cups interface, so go back to http://localhost:631 and try it.
- Go back to the CUPS web interface and click 'Add Printer'
- You'll be asked to for some details, I filled it in like this:

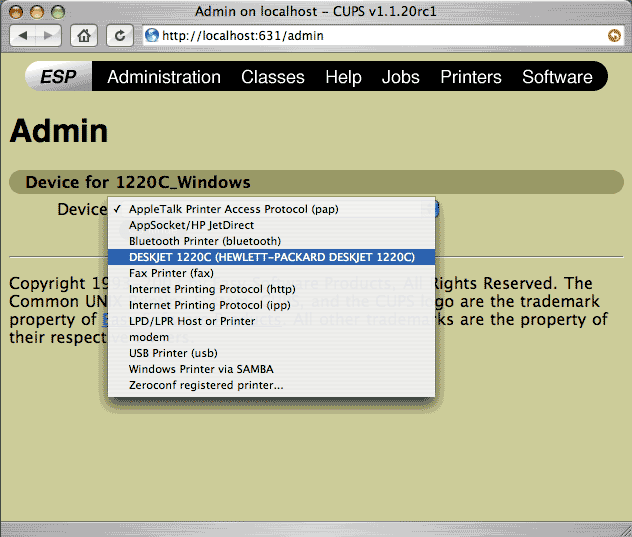
- When it asks you to choose a device, choose your local printer from the list:
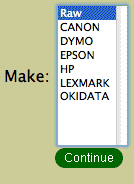
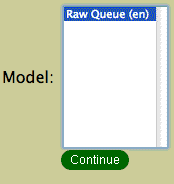
- When asked for the make of your printer, choose 'Raw'. Choose 'Raw Queue (en)' when asked for to specify the model, then click continue.
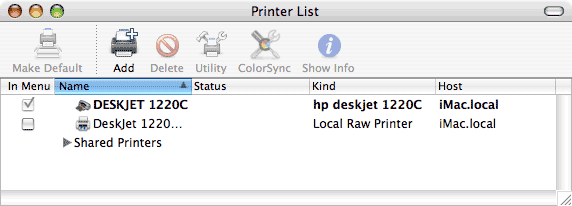
- Voila! You'll hopefully see a notification that the printer was added. Click continue and you'll be returned to your list of printers. What we want to see is your local printer and your 'virtual' printer for windows:

- If you return to Printer Setup Utility, you can see your 'virtual' printer:
That completes the configuration on the Mac. Lets continue and set up the PC.
On your PC
This procedure is written with reference to Windows XP Pro.
If you haven't already, start by obtaining and installing the latest Windows driver for your printer from the manufacturer's web site.
- Go to 'Start|Settings|Printers and Faxes'
- Go to 'File|Add Printer'
- Click next and choose to add a Network Printer
Supply the path to your printer like this:

-
You should enter the URL in this format:
http://[name of your mac]:631/printers/[name of your printer]
The name of your Mac should match the one you supplied earlier in the 'System Preferences --> Sharing' pane on your Mac. Click next. - If you find that you are having problems, you could try substituting the IP address in place of the name of your computer, but bear in mind that the IP may change if it is assigned by DHCP.
You'll be asked for a printer driver. Use the Windows driver supplied by your printer manufacturer.

- Decide whether or not you want to set it as the default printer.

- If all goes well, you'll see a screen confirming your settings.
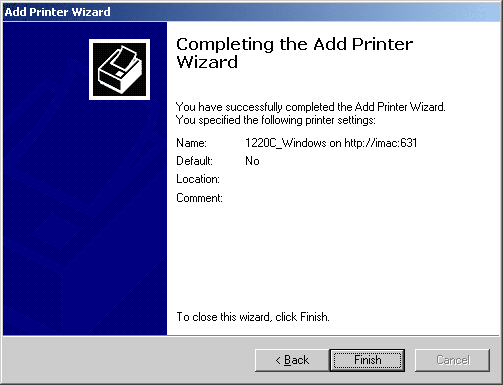
- You should see the new printer in your Printers and Faxes window. You should right click on it and choose properties
- If you don't use American paper, now would be a good time to set it to use ANSI standard (A4, A3, etc.) paper using the 'Device Settings' Tab
- Flip back to the 'General' tab and Click 'Print Test Page'. Hopefully, a nice Windows XP printer test page will emerge from your printer!