
Getting Time Machine to Work The Way I Want
21st Mar 2008, 12:28:51
There are loads of Time Machine hacks on the web. Here's mine.
My backup disks are installed in a Debian Linux server. I've been using a script to mount the disks over NFS and then rsync my data to them. Although this works, I really wanted to try Time Machine having just got a MacBook Pro with Leopard installed.
| Note: This method is not supported by Apple and might be a bit flaky. Don't rely on it as your sole backup method. As with everything on this site, just because I wrote it, don't think for a moment that it's my fault if you break something. | ||
Firstly, I used this command to enable 'Unsupported' network shares:
defaults write com.apple.systempreferences TMShowUnsupportedNetworkVolumes 1
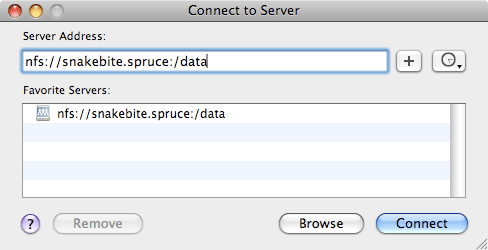
I then mounted the NFS volume in the Finder (Go -> Connect to Server)
This allowed me to select the NFS volume as a backup disk in Time Machine preferences. However, trying to actually run a backup resulted in the following in the system.log:
Mar 19 21:27:26 mbp System Preferences[592]: Time Machine: Error 45 returned by NetAuthOpenSession()
Mar 19 21:31:08 mbp /System/Library/CoreServices/backupd[601]: Backup requested by user
Mar 19 21:31:08 mbp /System/Library/CoreServices/backupd[601]: Starting standard backup
Mar 19 21:31:08 mbp /System/Library/CoreServices/backupd[601]: Backup failed with error: 17
I tried a few tricks such as creating the disk image manually, but to no avail. In the end, I decided to use Samba to share the disk, since lots of people reported success with backing up to SMB/CIFS shares.
This was really easy on Debian:
Install Samba:
# apt-get update && apt-get install samba
Comment out all the existing shares in /etc/samba/smb.conf and append your share to the file:
[data]
comment = Backup area
path = /data
valid users = stocksy
public = no
writable = yes
create mask = 0765
guest ok = no
Set a Samba password for your user account:
# smbpasswd stocksy
Restart Samba
# /etc/init.d/samba restart
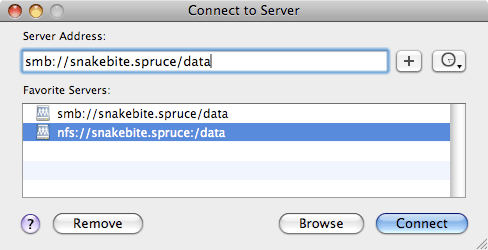
On the Mac, mount the share in the finder as before, but using the smb:// prefix.
This almost works, but Time Machine seems to have difficulty creating its disk image directly on the remote share. This is easy to correct:
sudo hdiutil create -size [size in GB]g -type SPARSEBUNDLE -nospotlight -volname "Time Machine" -fs HFS+J -verbose ~/Desktop/[Your\ Computer\ Name]_[YourMACAddress].sparsebundle
Replace the values between the [ ] with what you need, for example:
sudo hdiutil create -size 200g -type SPARSEBUNDLE -nospotlight -volname "Time Machine" -fs HFS+J -verbose ~/Desktop/mbp_000393ad15fc.sparsebundle
Then move the disk image to your share:
sudo mv ~/Desktop/*.sparsebundle /Volumes/data
It appears you have to use hdiutil to do this because Disk Utility.app will (probably) complain that there is not sufficient space to create the image on your desktop.
Now you can select your Samba share as the Time Machine destination in Time Machine preferences.
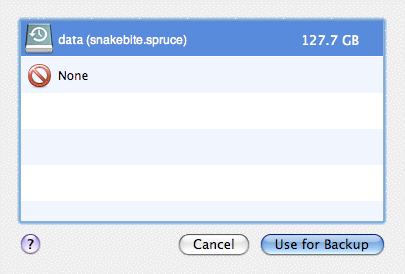
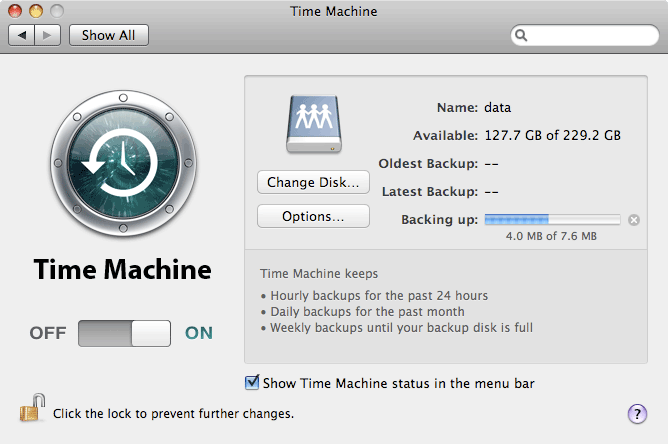
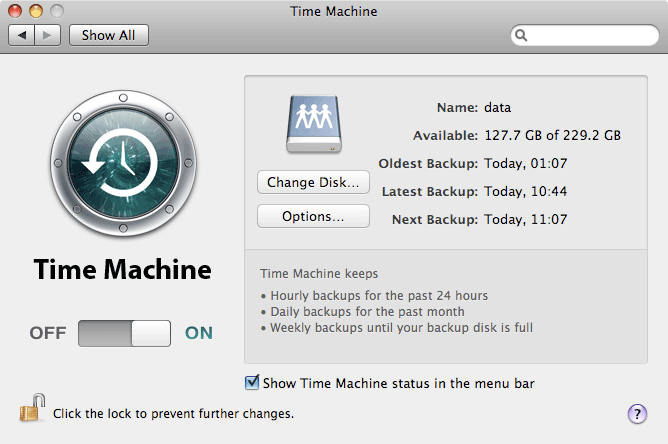
Hopefully it should confirm your selection in the preference pane:
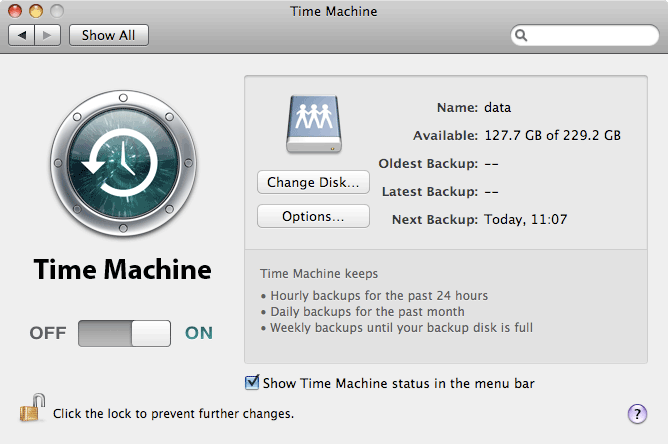
If you choose 'Backup Now' from the Time Machine icon in the menu bar it should succeed.
| If you don't have any luck, it is useful to look in /var/log/system.log | ||